How To Start A Blog In 2024 [Updated] ?
Do you want to start a blog? If yes, here you will get a proper niche about how to start a blog. It is the best medium to share your ideas, experience, and suggestion with others. And as a bonus, you can earn from it. Isn’t it amazing that expressing your thoughts and experience and earning money?
Several people want to communicate and express their thoughts to others, but they cannot. So, let me tell you the best way to do that is to start a blog. Some start a blog as per their interest. Whereas some start it to make money, after all with less effort you can earn more.
Well starting a blog is not so tough job but to maintain it, you need to work harder. Are you Clueless, confused, and confounded about how to start a blog? If you are a beginner and don’t get an idea to start your blog, then this article is exactly for you. Today, in this article, I am going to discuss the overall process of creating a powerful and attractive blog.
So keep patience, have a cup of coffee, and go through this article without missing any step. you will clearly know how to start a blog. Let’s get started:
Step 1: Select a perfect niche
If you have made up your mind for starting a blog, you need to think about a perfect niche for starting it. Make sure you choose it from your interested area. If you do so you will love your work and can do it perfectly. You will enjoy your blogging if you choose it from the topic you passionate about.
Suppose you have several interesting topics, then give priority to those that have enough audience interest. Once you get ready with your niche, check it once again, explore your competitors, and finally analyze your monetization potential.
Step 2: Choose a blogging platform

So you have your niche to start with, isn’t it? Now the point is where to start, well for this you need to choose your blogging platform. Choose such a platform which has determined blog management software. And for this, I suggest you go with WordPress.
WordPress is a versatile, flexible, and content management system. It is used by almost a third of the world’s websites, which is huge. With its outstanding tools and elegant features, you can create any niche of blogs. WordPress has a large community which comes with dedicated support forums and step-by-step guides for common tasks.
Step 3: Choose your domain name
Now it’s time to choose your domain name. A domain name is your site’s address on the web. Or you can say it is your blog’s unique address on the Internet. You need to be careful and choosy in this case as it creates your first impression. The domain name will be the name of your blog, also known as your URL. As the domain name of this blog is www.mantrabrain.com.
While drafting your domain name, make sure it is related to your blog niche. It means it should reflect what exactly your blog is about. In case you are not getting any idea about it, you can take help from several domain naming tools like Wordoid. It will suggest domain name, go through that, and get the suitable one for you.
Most of the domain names go for “dot com”. But you can also keep it as your country or niche-specific. Also, you can get several other extensions like “dot net” or “dot blog”.
Step 4: Get a web hosting account

Once you finished with a domain name, the next important thing you should do is select your web hosting. Web hosting is a service that allows your website or web page onto the Internet. Your site depends on web hosting to get extent functionality and performance. It is responsible for keeping your site available 24/7 to potential readers. Several hosting companies are providing you a free domain for the first year when you buy their services.
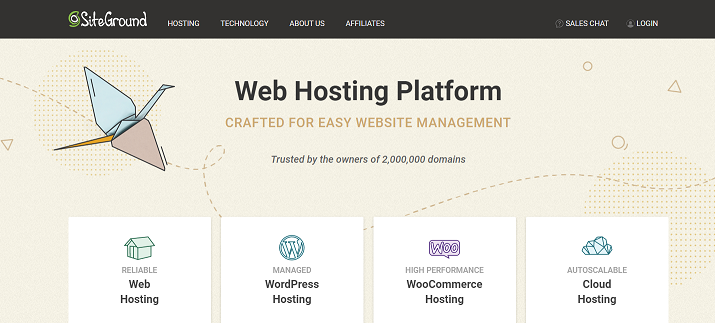
Choosing a web hosting will not be an easy task, as these are several in numbers. You need to verify every necessary element within your web host as a wrong web host can cause many problems. Well among several web-hosting providers, we suggest you go through SiteGround. So you might be thinking why SightGround, why not others? Well, you will get your answer through the following features:
- Quick website Building
- Smooth Website Transfer
- Ultra-fast network and SSD persistent storage
- Offer free Let’s Encrypt SSL to keeps your data safe and daily backups
- Easily manage your site built on the most popular Content Management Systems such as Joomla, Magento, WordPress, and others
- Managing both your domain and site in the same place
- Reliable Email Service
Well from the above features you get a clear idea about its popularity and security. It is a fast and secure Web hosting provider. But still, there are several Web hosting providers you can go with.
Step 5: Install WordPress and know how to start a blog
Well in the previous step we decided to go with WordPress. So you need to install it on your computer. You can follow the given instruction to install WordPress. Here we go:
- Download and unzip the WordPress package
- Create a database for WordPress on your web server, as well as a MySQL
- Upload the WordPress files to the desired location on your web server
- Move or upload all contents of the unzipped WordPress directory into the root directory of your web server expect WordPress directory. (installing on root directory)
- Create the directory on your server and upload the contents of the unzipped WordPress package to the directory via FTP. ( own subdirectory)
- Run the WordPress installation script by accessing the URL in a web browser
- Go through http://example.com/, if you have installed WordPress in the root directory
- For own subdirectory, visit http://example.com/blog/
Step 6: Install Theme
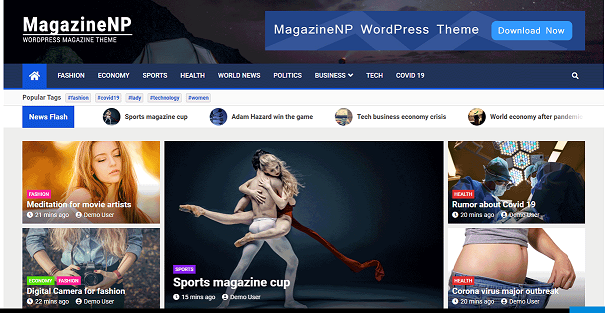
Now the next step is to install a theme for your site which gives a perfect design to your blog. WordPress theme will help you to manage your content within your site. WordPress directory contains thousands of free and premium plugin. From that long list, there is an amazing theme called MagazineNP.

MagazineNP is a wonderful theme that comes with several amazing features. You can implement this for your online portal, Magazine, publisher, news portal, and many others. The reasons for choosing MagazingNP are:
- One-click demo import
- Mobile responsive
- SEO friendly
- Modern design for magazine
- Attractive customization options
- Theme style homepage
Step 7: Setup Plugin
Plugins are responsible for providing better design and adding great functions. It will help you to showcase your site elements. The plugin adds new functionality to your blog and gives it an elegant look. If you visit the WordPress directory, you will get thousands of plugins both in the free and premium versions. If you are beginners go for the free one. But if you want advanced customization, choose the premium plugin.
Among so many plugins, here I have listed some popular plugins for bloggers:
Step 8: Create and Publish Posts
Finally, you have set up your website with a complete framework. Now, it’s time to create your very first blog. So start writing your content for your blog. Choose something interesting which will attract your viewer’s attention and make them stay for a longer time.
To make it powerful and attractive, you need to include photos, graphics, audio, and video along with eye-catching words. If you want more traffic, your content should be easily accessible and attractively presented. Create your blog and customize it for SEO through different tools.
Once you are done with it, have a look for its preview. It will show how your blog looks when it goes online. And if you see any alter, you can quickly customize it. After everything looks fine, you can click on the “Publish” button and publish your blog.
Congratulation you have successfully uploaded your first blog.
Conclusion
With the above steps, you can easily start your blog. You need to follow each step perfectly if you want a better result. After going through these all, you have your domain name, hosting space, and your blog. Now you can start your blog and get a chance to become a successful blogger.
I hope you get this article helpful to you. I am sure you are now able to create an outstanding blog with the above simple steps. If you are getting any trouble or have any queries regarding this tutorial, feel free to send your questions. You can send your queries through our comment section. Stay tuned and keep following our website for upcoming articles.

